Having a functioning, clean bathroom fan is essential for proper ventilation and air circulation in your home. However, over time, the fan can become clogged with dust, dirt, and debris, reducing its effectiveness and making it difficult to use. Fortunately, cleaning a bathroom fan is a relatively straightforward process that can be done with just a few simple tools and supplies.

Understanding the Importance of Cleaning Your Bathroom Fan
Over time, bathroom fans can accumulate dust, dirt, and moisture, creating the perfect breeding ground for mold and mildew to thrive. This buildup can impair the fan's ability to effectively ventilate the bathroom, leading to unpleasant odors, excess humidity, and even the formation of harmful bacteria.
Regular cleaning of your bathroom fan not only ensures optimal performance but also improves indoor air quality. When the fan becomes clogged with debris, it hampers its ability to remove odors and moisture from the bathroom.
Safety Precautions and Preparation
Here are some safety precautions you should follow before beginning the cleaning process:
Switch Off The Power
Before starting any work, ensure to switch off the power supply at the circuit breaker. This will prevent any accidents and ensure your safety.
Use A Ladder or Step Stool
If your bathroom fan is mounted on the ceiling, use a sturdy ladder or step stool to reach it safely. Make sure the ladder is on a stable surface and follow the manufacturer's guidelines for weight limits.
Wear Eye Protection
When cleaning the fan, there is a possibility of dust or debris getting into your eyes. Wear safety goggles or glasses to protect your eyes from any potential harm.
Now that you've taken the necessary safety precautions, gather the following tools and cleaning agents for the cleaning process:
Screwdriver: You will need a screwdriver to remove the fan cover and fan blades. Choose the appropriate size and type of screwdriver based on the screws used in your fan.
Vacuum cleaner with attachments: A vacuum cleaner with a crevice tool and brush attachment will help you remove any visible dust and dirt from the fan housing and components.
Mild cleaner or soapy water: Prepare a solution of mild cleaner or soapy water to clean the vent cover, fan blades, and fan housing. Avoid using abrasive cleaners or harsh chemicals, as they may damage the fan.
Removing the Fan Cover
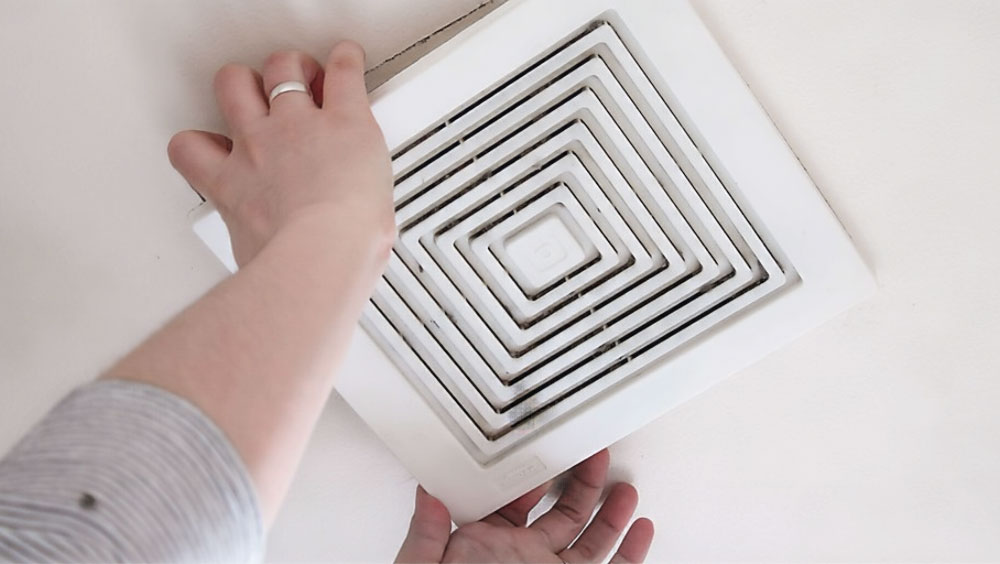
Removing the fan cover or grille is an essential step in cleaning your bathroom fan. Here's how to do it safely:
Turn off the power: Make sure to switch off the power supply at the circuit breaker to prevent any accidents.
Locate the screws: Look for the screws that secure the fan cover or grille in place. These are typically located on the sides or corners of the cover.
Use a screwdriver: Select the appropriate size and type of screwdriver and carefully unscrew the screws. Place the screws in a safe location to avoid losing them.
Gently remove the cover: Once all the screws are removed, gently detach the fan cover or grille from the housing. It may be held in place by spring clips or other mechanisms, so be cautious not to force it.

Cleaning the Fan Blades and Housing
To clean the fan blades, start by using a vacuum cleaner with a brush attachment. Gently run the brush along each blade to remove any visible dust or dirt buildup. Make sure to reach all sides of each blade to ensure a thorough cleaning. If your vacuum does not have a brush attachment, you can also use a damp microfiber cloth to wipe down the blades.
Next, let's move on to cleaning the housing and motor area. Take a damp cloth and wipe down the inside of the housing, being careful not to get any excess moisture on the motor. If there is any stubborn dirt or dust, you can use a cotton swab or toothbrush to gently scrub the area. For a deeper clean, you can use a mild all-purpose household cleaner diluted with warm water. Afterward, use an absorbent towel to dry the area thoroughly.
Washing the Fan Cover
Cleaning the exhaust fan cover is an essential step in maintaining a clean and efficient bathroom exhaust fan. Here's how you can wash it effectively:
Safety first: Before starting the cleaning process, switch off the power to the fan at the circuit breaker box. This extra safety precaution protects you from any potential electrical hazards.
Remove the cover: Depending on your fan model, the cover might be attached with spring clips or screws. Carefully detach the cover from the fan unit, following the manufacturer's instructions.
Use a mild cleaner and water: Fill a bucket or sink with warm water and add a few drops of dish soap or mild all-purpose household cleaner. Stir the solution to create soapy water.
Clean the cover: Dip a microfiber cloth into the soap solution, wringing it out to drain the excess moisture. Then, gently wipe down the fan cover, removing as much dust as possible. For hard-to-reach areas, use a crevice tool or a brush attachment on a vacuum cleaner.

Rinse and dry: After thoroughly cleaning the cover, rinse it with clean water to remove any soap residue. To ensure the cover is completely dry before reinstallation, place it on a clean, absorbent towel and let it air dry.
Reassembling and Testing the Bathroom Fan
Reassemble the fan cover: Once the cover is completely dry, carefully align it back onto the fan unit. Follow the manufacturer's instructions to ensure that the cover is securely attached. For covers held by spring clips, press them back into place until they latch. For covers secured with screws, use a screwdriver to tighten them.
Reconnect the power supply: Go to the circuit breaker box and switch the power back on to the fan. Double-check that it is securely connected and that all electrical connections are in place.
Test the fan: Turn on the fan to ensure it functions properly. Listen for any unusual noises or vibrations. If the fan does not turn on or exhibits any issues, switch off the power immediately and consult a professional for further assistance.
Conclusion
In conclusion, cleaning your bathroom fan is an essential step in maintaining optimal performance and a healthy bathroom environment. By following the steps outlined above, you can ensure that your fan remains efficient and free from dust, mold, and odors.


